Riso Print Guide
What is Risograph printing?
Risograph printing (Riso) utilizes a digital stencil duplicator for high-quality prints with vibrant colors and distinctive textures. Using eco-friendly vegetable-based and rice-bran inks, Riso is renowned for its unique imperfections, making each print one-of-a-kind. Popular among small businesses, writers, and artists, Riso printing caters to custom, eye-catching projects like posters, zines, books, and illustrations.
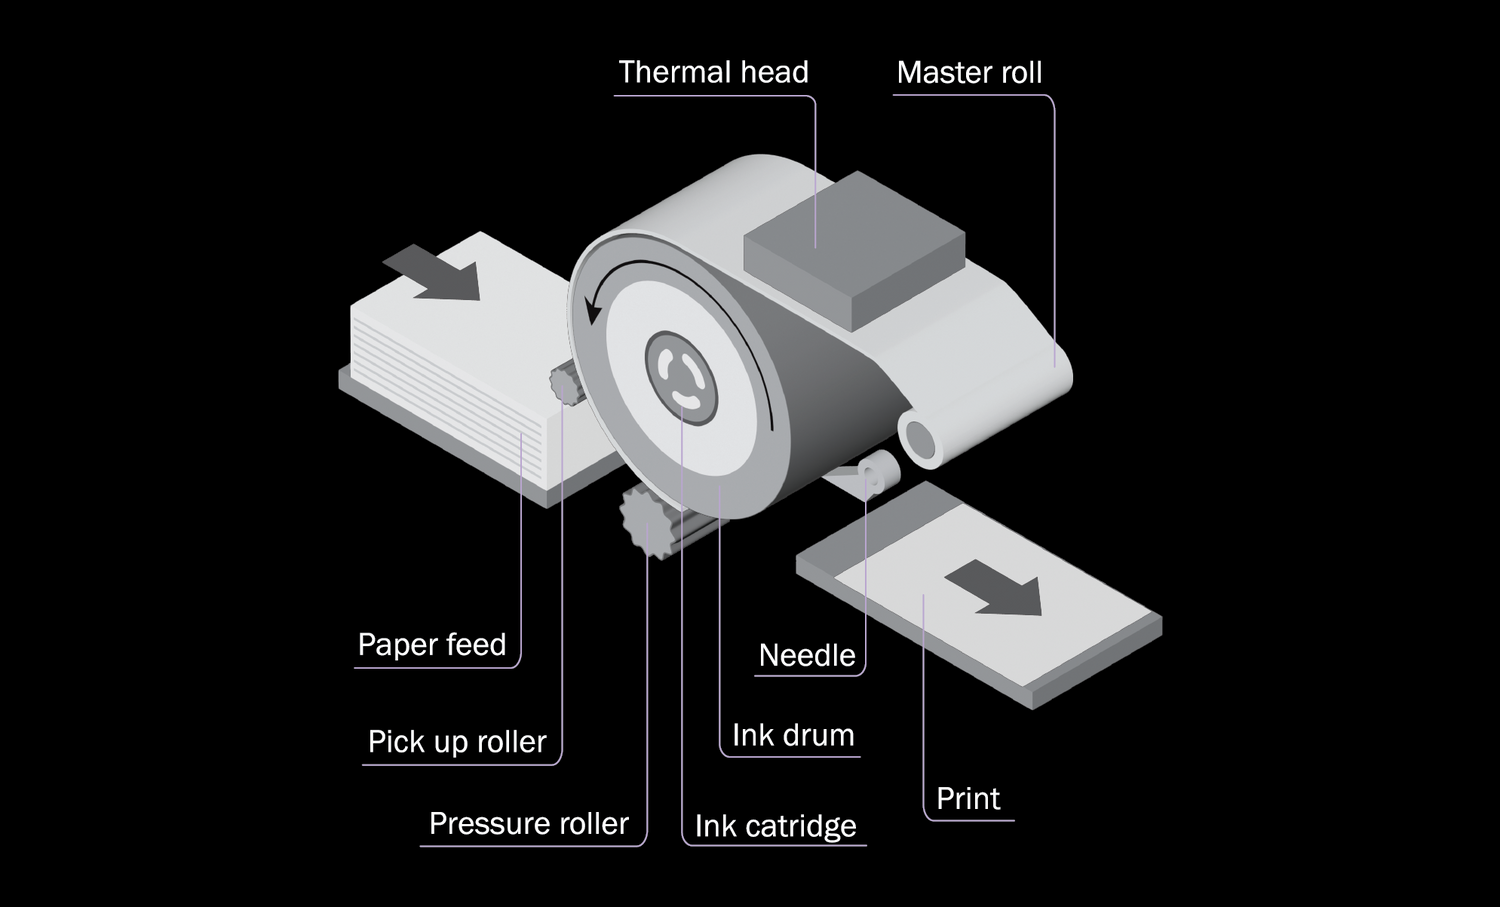
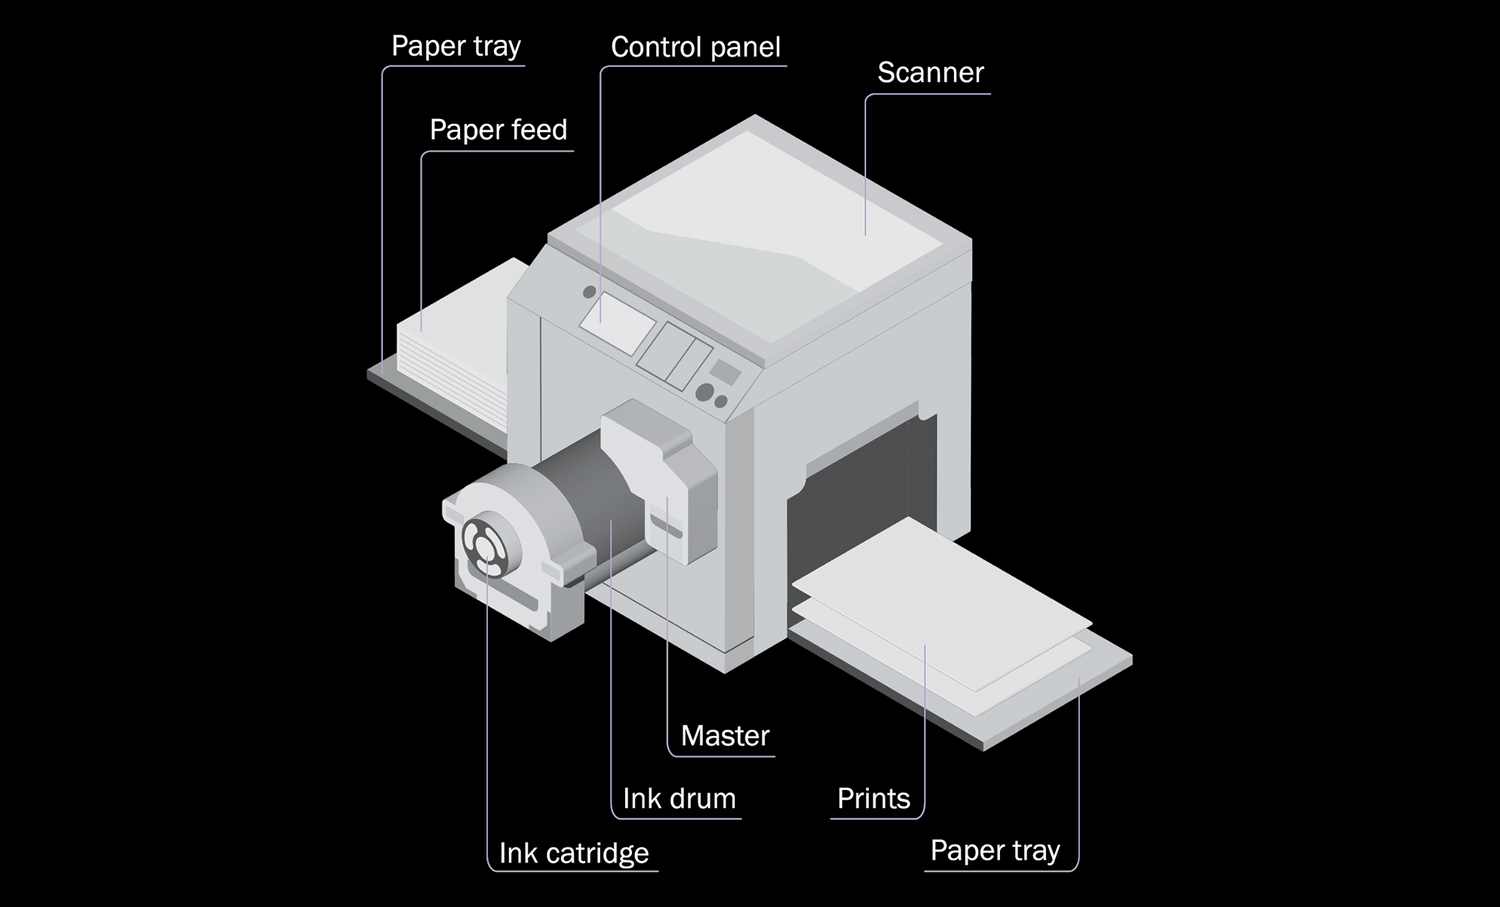
How does the Risograph work?
The Riso printer operates by creating a stencil, known as a master, from a black and white digital file. This master is then wrapped around a rotating ink cylinder. As the cylinder turns, wet ink pigment is forced through the stencil’s perforations, transferring the ink onto the paper, creating the printed image.

Riso Quirks
Registration errors
As each color is layered separately, it is unlikely that Risograph prints will have perfectly aligned colors.
Ink transparency
While Risograph ink is translucent and allows for layering to create new colors and effects, it can appear slightly transparent, particularly on darker paper stocks.
Uneven ink coverage
Large areas of solid ink coverage may appear uneven, hence it is recommended to set the opacity at 75% MAX.
Smudging
Risograph ink, akin to newspaper ink, will never fully dry, leaving prints susceptible to smudging.
Roller marks
The paper feed rollers may pick up ink from a previous print and leave roller marks on the subsequent print, adding to the print's uniqueness.
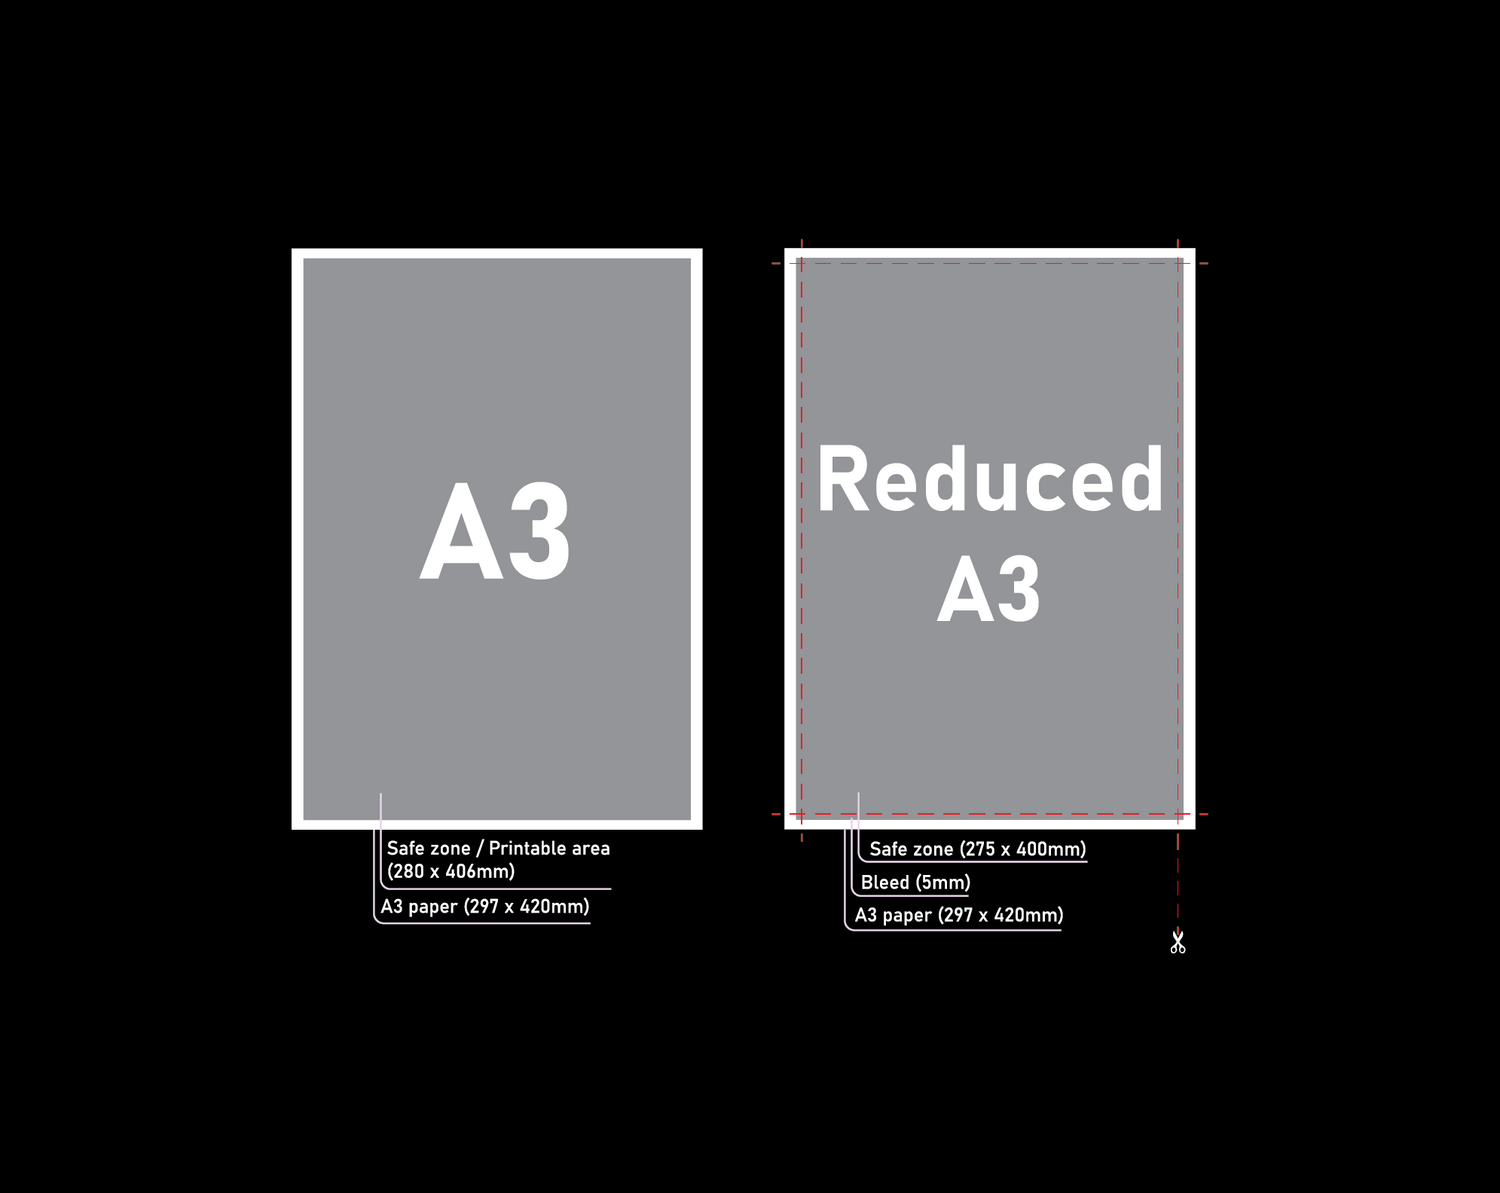
Paper / Printable Area
- Max. paper size: 297 x 420mm (A3)
- Max. printable area: 280 x 406mm, including crop marks and bleed
- Full bleed printing is NOT possible with Riso, so any trimmed prints will be slightly smaller than A3.
- To reduce printing costs, consider placing multiple copies of small artwork on a single sheet.
- Riso prints only on uncoated paper ranging from 80gsm to 300gsm.
- When printing with a lot of ink, it's recommended to use thicker paper to avoid any issues with paper warping or
ink bleeding. - If you are to print on both sides of the paper, we suggest not using more than 3 colors on one side, and your design must avoid going full bleed!
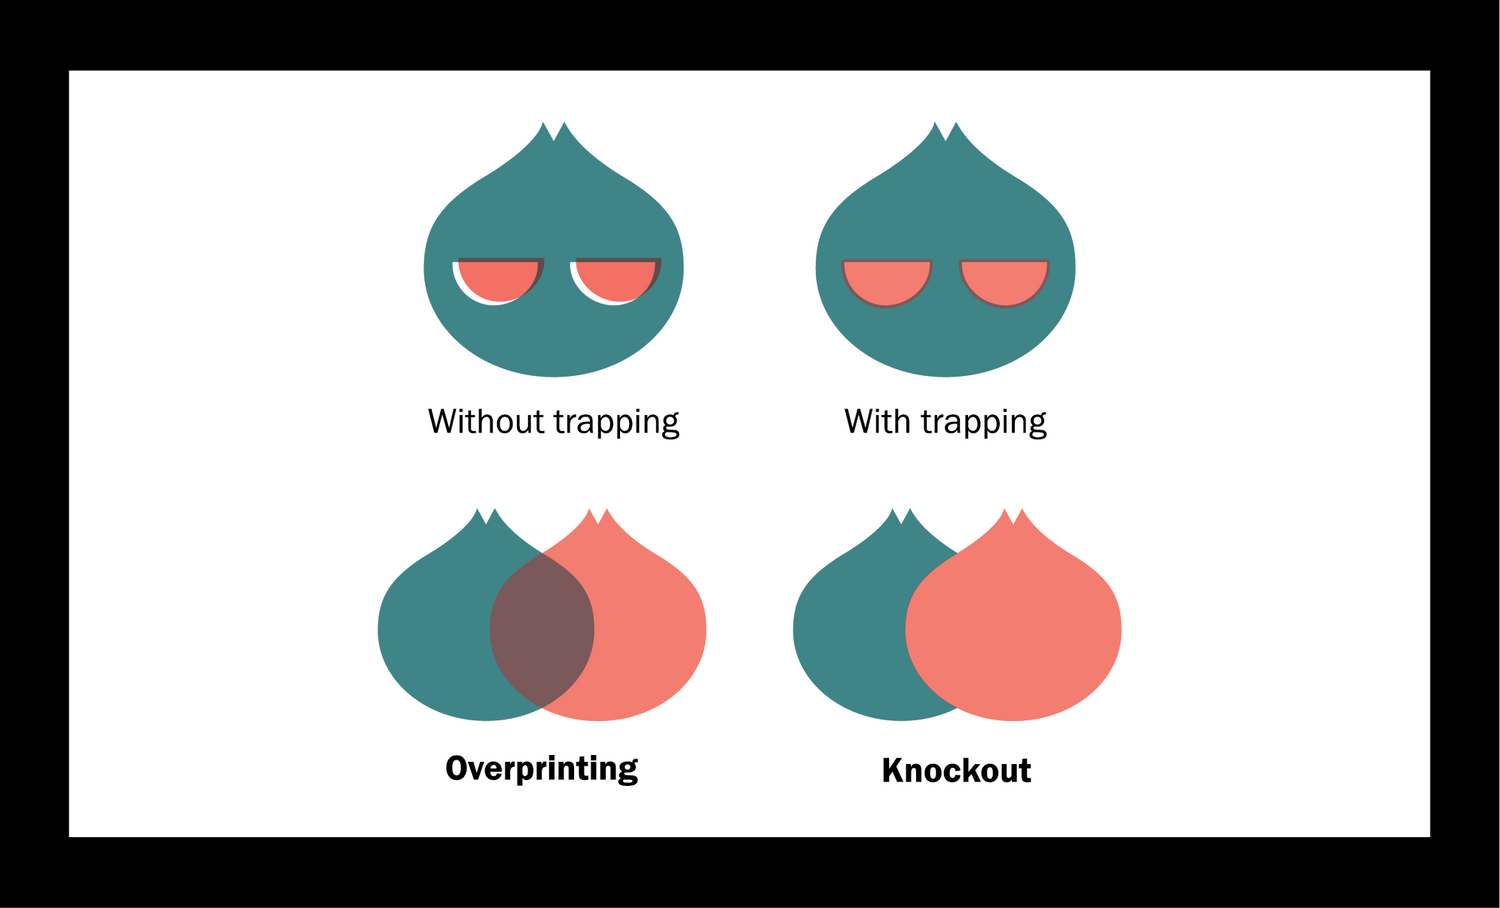
Trapping
Refers to the technique of overlapping colours in printing to prevent gaps or white spaces between them.
Overprinting
Layering colors on top of each other to create a new color or effect.
Knockout
Cutting out one color to reveal the color beneath it.
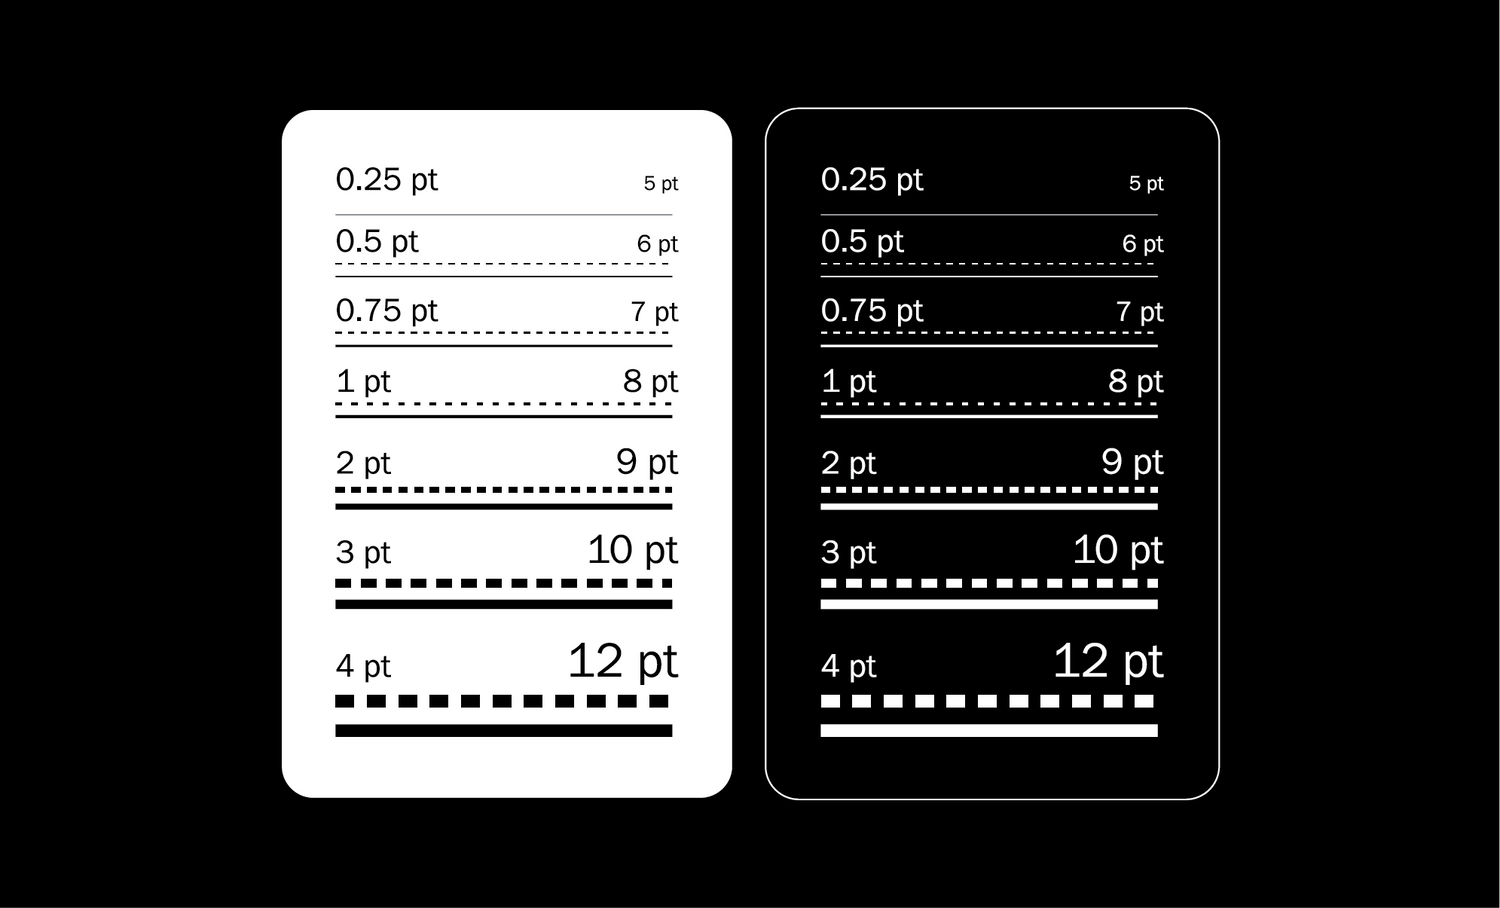
Text & Stroke Weight
- The minimum size for text is 5pt, and 8pt for knockout.
- It's best to use vector graphics and outline text to avoid issues with rasterization. Avoid setting type in Photoshop as it may cause rasterization.
- Single-color text is recommended for optimal readability.
File Set-up
1. Setting up file
Riso printer only recognizes PDFs in B&W for the master-making process. Thus, all images and elements in the file must be compatible with the printing mode.
- 280 x 406 mm canvas size (including crop marks & bleed)
- RGB color mode (for better color estimation)
- 300 – 600 dpi
2. Separating colours
Please separate the colors into individual layers. For Ai / Ps files, set up one color in one layer / group. Or you may simply export each color into one PDF file.
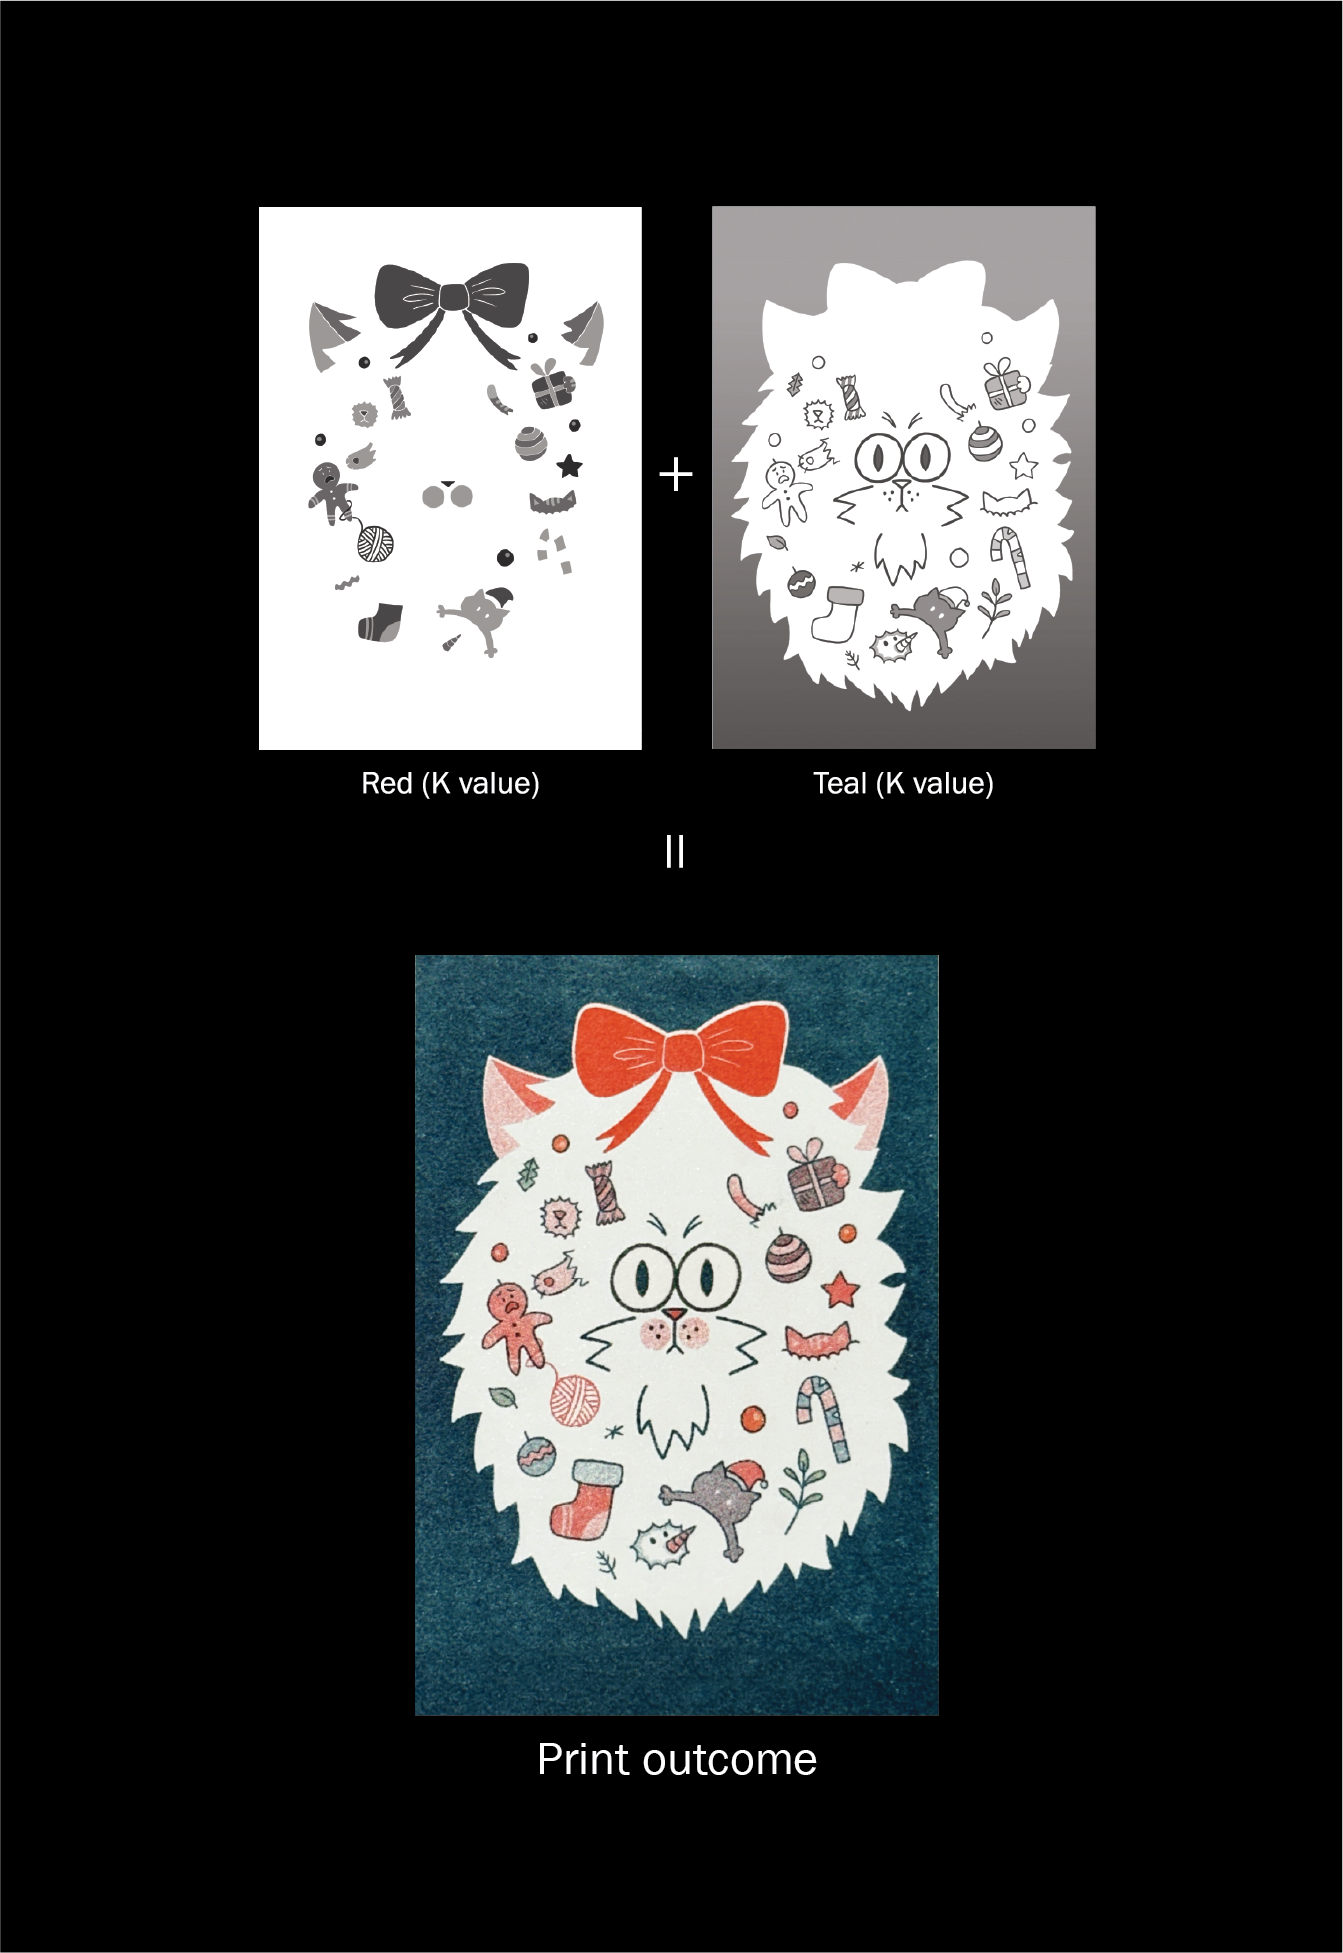
3. Making print files
After color separation, set to K value (black) only. The print file must have crop marks. Leave a 3-mm bleed when your files are in full bleed. Mark the name of colour in each filename/layer. Flattened (keep effect transparencies)
Spectrolite lets you do color separation for Risograph, to make the greyscale files that the printer uses to make the stencil(s) for each ink color.
***Include a final visual proof PDF / jpeg

Booklet / Zine
- Paginated before printing
- MAX zine size: 190 x 277mm
- MIN zine size: 75 x 105 mm
Always make mockup for reference purpose!